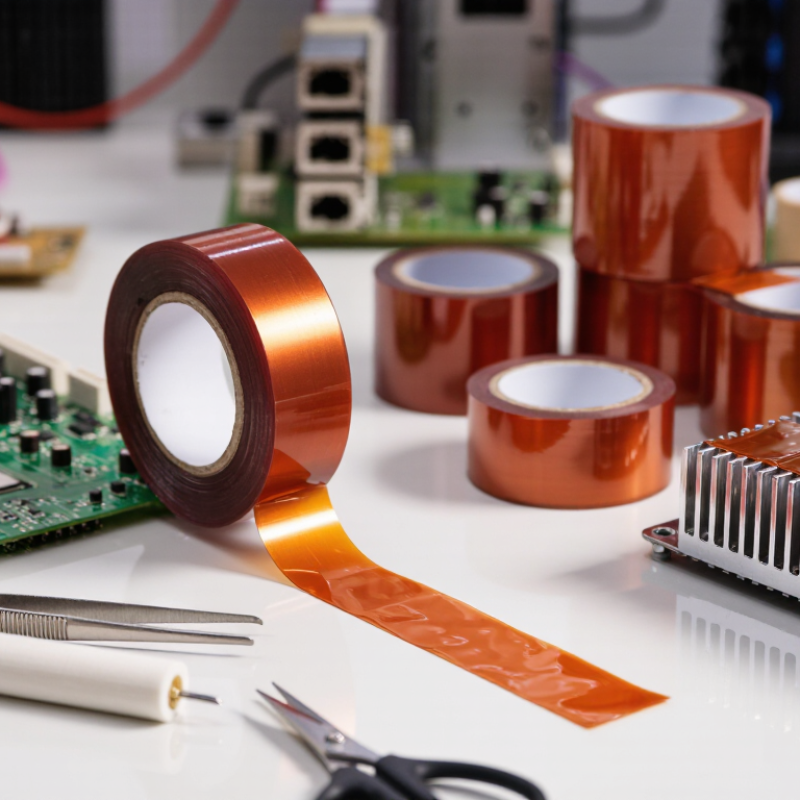
Choosing the best Polyimide Tape is not simply a matter of selecting the highest temperature rating. Real performance depends on the surface, pressure, exposure time, and production method. A tape that works perfectly on a flat circuit board may lift from a textured metal edge. Small details matter.
Dr. Kenneth L. Mittal, a recognized polyimide materials editor, offers a useful principle: “Select polyimide materials by application demands, not reputation alone.” This idea applies directly to tape selection. Before comparing brands, examine the operating temperature, dielectric requirements, adhesive chemistry, thickness, and expected removal method. Silicone adhesives often suit high-temperature masking. Acrylic adhesives may provide stronger bonding and cleaner handling in other processes. Neither option is universally better.
My practical experience suggests that many selection errors begin with a narrow specification sheet. Engineers may focus on temperature resistance while overlooking adhesive transfer, winding tension, or storage conditions. That can create failures beside an oven, not inside it. Test the tape on the actual substrate. Apply realistic pressure. Expose it to the intended heat cycle. Then inspect lifting, residue, edge sealing, and surface damage.
There is also room for doubt. A laboratory result does not guarantee production success. A premium Polyimide Tape can still fail when the surface contains oil, dust, or moisture. This guide explains how to compare these factors carefully. It also highlights trade-offs that product descriptions often leave unclear.
Polyimide tape is an electrical and high-temperature adhesive tape. Its core is a thin polyimide film, usually amber and dimensionally stable. One or both sides carry a pressure-sensitive adhesive. Silicone adhesive handles heat well and releases cleanly from many surfaces. Acrylic adhesive may offer stronger bonding and better aging resistance. The choice depends on the application, not color.
Its structure controls performance. A thicker film improves tear resistance and handling. A thinner film conforms better around sharp corners and small components. The adhesive layer affects insulation, shear strength, residue, and removal force. In practical assembly work, I check the tape on the actual substrate first. Dust, oil, roughness, and surface energy can change results dramatically.
Key properties include dielectric strength, temperature resistance, tensile strength, elongation, and flame behavior. A tape may tolerate a high peak temperature but fail during long exposure. That distinction is easy to miss. Width and thickness also matter near connectors, coils, and circuit edges. For masking during soldering, stable adhesion and clean removal are essential. For insulation, consistent film thickness and reliable electrical separation matter more. Some datasheets appear precise, yet test conditions differ between suppliers. I would request sample rolls and record peel, removal, and thermal results before selecting a production grade. No tape fits every task.
This chart compares representative continuous-use temperature levels for common polyimide tape constructions. Standard polyimide film is suitable for general electrical insulation and masking, while silicone-adhesive grades are preferred when higher-temperature exposure, clean removal, and flexibility are required. Actual performance depends on film thickness, adhesive formulation, dwell time, pressure, and substrate condition.
Values shown are typical engineering figures reported for generic polyimide film and adhesive systems; always verify the technical datasheet for the selected tape.
Choosing polyimide tape starts with the working temperature, not the color or thickness. Check the continuous temperature range, short-term peaks, and heating cycles. A tape may survive a brief soldering step but fail during repeated thermal exposure.
I once selected a tape by its peak rating alone. That assumption failed. The adhesive softened near a heated connector and left residue on the surface.
Electrical requirements need equal attention. Review dielectric strength, insulation resistance, and tape thickness. Thin tape can fit tightly around wires, but it may provide less protection against sharp edges. For circuit work, confirm that the adhesive remains stable under voltage and heat. Clean application matters too. Dust, oil, and stretched tape can create weak points. Test a small sample under realistic voltage before production use.
Write down the highest temperature, exposure time, voltage, and contact materials. Check chemical compatibility with flux, cleaning agents, oils, and solvents. Do not rely on a general “chemical resistant” claim.
Request technical data and, when possible, perform a short immersion or wipe test. Watch for swelling, discoloration, peeling, and residue.
Slightly wider tape may improve coverage, though it can complicate tight assemblies. Recheck the choice after changing the substrate or process. Small changes matter.
Choosing polyimide tape starts with the working condition, not the color or price. In repair work, I check temperature, voltage, surface energy, and removal time before selecting a roll. A silicone adhesive handles many high-temperature masking tasks and removes cleanly from smooth surfaces. Acrylic adhesive can offer stronger long-term bonding and better resistance to some chemicals. However, adhesive performance changes with pressure and heat.
Thickness affects handling, insulation, and edge coverage. Thin tape fits tightly around wires, circuit corners, and narrow connector gaps. Thicker tape feels easier to apply and can resist minor abrasion more effectively. It may also create unwanted steps under components. Measure the gap carefully. A few extra microns can matter in compact assemblies.
Backing options deserve equal attention. Standard polyimide film provides dimensional stability during soldering and controlled heating. Antistatic versions may reduce charge concerns during sensitive electronic assembly. Single-sided tape suits masking and insulation, while double-sided constructions support temporary mounting. Check tensile strength, dielectric rating, temperature limits, and residue data from the technical sheet. I once selected a tape based only on its temperature rating; removal left adhesive traces after prolonged heating. That result was a useful reminder. Test a small sample on the actual substrate, using the real dwell time and pressure. Surface coatings, contamination, and storage age can change the outcome.
How to Choose the Best Polyimide Tape for Your Needs?
Choosing polyimide tape starts with performance, not color or price. Check the rated temperature range, dielectric strength, tensile strength, and elongation. These values should match your process, not merely exceed it on paper. A tape used near a soldering area may need heat resistance above 200°C, but the adhesive can still weaken first. That detail is often missed. Test a small sample under real heating and cooling cycles.
Compatibility matters just as much. Examine the substrate, surface energy, coating, and expected contact time. Silicone adhesives often support high-temperature removal, while acrylic adhesives may offer stronger bonding on selected surfaces. Neither option is automatically better. Clean metal, glass, and polymer surfaces differently, then apply steady pressure with a suitable roller. Dust, oil, and moisture can create hidden lift at the edges. I would also check residue after aging, because clean removal during the first hour proves very little.
Safety and application conditions deserve equal attention. Review the technical data sheet and safety information before handling the tape. Confirm ventilation needs, storage limits, and possible skin or eye irritation. During use, record temperature, humidity, pressure, dwell time, and removal angle. Small changes can affect results. Avoid stretching the tape unless the design allows it; tension may cause shrinking or edge release. My earlier assumption that a thicker tape was always safer proved unreliable. Thickness can improve handling, yet it may reduce flexibility in tight corners. A controlled trial remains more trustworthy than a specification alone.
How to Choose the Best Polyimide Tape for Your Needs?
Select the tape around the real process, not the product label. A 2024 MarketsandMarkets report estimates the global polyimide films market at about USD 1.2 billion in 2023, with continued growth driven by electronics and thermal applications. That growth does not make every tape suitable. Check backing thickness, adhesive type, dielectric strength, tensile strength, and service temperature. A thin tape may wrap neatly around a coil, yet it can tear during removal. Measure twice.
Test a small sample under actual conditions. Apply it to the same metal, polymer, or circuit surface used in production. Record peel behavior after heating, cooling, humidity exposure, and electrical testing. ASTM D1000 provides recognized methods for evaluating pressure-sensitive tape adhesion, tensile strength, and elongation. Use those methods where possible, but do not treat laboratory results as field truth. A 180-degree peel test may look excellent while residue appears after repeated thermal cycling. It looked fine.
Maintenance is practical, not decorative. Store rolls sealed, dry, and away from direct sunlight. Keep them near stable room temperature before use. Clean surfaces with a compatible solvent, then allow them to dry fully. Operators should record lot numbers, application temperature, dwell time, and removal results. Review failures honestly; surface contamination, excessive tension, or rushed application may be the real cause. No test is perfect.
| Selection or Maintenance Factor | Typical Options or Values | Recommended Choice or Practice | Why It Matters | How to Verify |
|---|---|---|---|---|
| 1. Select the Tape | ||||
| Base Film | Polyimide film, commonly amber or transparent; typical thickness: 25–125 µm | Use thinner film for tight wrapping and low-profile insulation; use thicker film for improved handling and mechanical protection. | Film thickness affects flexibility, dielectric strength, edge protection, and finished-part dimensions. | Measure film thickness with a calibrated thickness gauge and review the technical data sheet. |
| Adhesive Type | Silicone adhesive or acrylic adhesive | Choose silicone for broad temperature resistance and clean removal from many surfaces. Choose acrylic when higher shear strength or stronger long-term bonding is required. | Adhesive chemistry largely determines temperature performance, residue behavior, adhesion, and removability. | Test adhesion and removal on the actual substrate after exposure to the intended temperature and dwell time. |
| Temperature Exposure | Short-term exposure may reach approximately 200–260°C, depending on construction; continuous ratings are often lower. | Select a tape with a continuous operating rating above the actual process temperature, not merely the short-term peak rating. | The polyimide film can tolerate high temperatures, but the adhesive may soften, lose adhesion, or leave residue first. | Run a process simulation using the real heating rate, peak temperature, dwell time, cooling cycle, and substrate. |
| Electrical Insulation | Typical dielectric strength: approximately 100–250 kV/mm, depending on film thickness and test method | Choose the required thickness and dielectric rating with a suitable safety margin for the working voltage. | Dielectric performance changes with thickness, humidity, temperature, defects, and test conditions. | Check dielectric strength, insulation resistance, and applicable electrical safety requirements for the finished assembly. |
| Adhesion to Substrate | Common substrates include metals, glass, ceramics, polymers, printed circuit boards, and powder-coated surfaces. | Match the adhesive to the surface energy, texture, cleanliness, and expected service temperature of the substrate. | A tape that bonds well to metal may perform differently on low-surface-energy plastics or textured coatings. | Use peel, tack, and shear tests on representative production materials rather than on laboratory panels alone. |
| Tape Width and Length | Common widths range from approximately 6–100 mm; custom widths may be available. | Select the narrowest width that provides complete coverage, or use a wider roll to reduce seams and installation time. | Incorrect width can cause exposed areas, excessive overlap, wrinkling, or unnecessary material waste. | Confirm the required coverage, overlap, bend radius, and cutting tolerance before ordering. |
| Conformability | Flexible film conforms well to smooth curves; thicker constructions are more resistant to tearing and handling damage. | Use a thinner grade for tight bends and a thicker grade for abrasion, edge protection, or repeated handling. | Conformability influences wrinkles, air entrapment, edge lifting, and the reliability of insulation coverage. | Apply the tape to the smallest production bend radius and inspect for creases, lifting, and gaps. |
| Chemical and Environmental Resistance | Polyimide film generally resists many oils, solvents, and chemicals, but adhesive resistance varies. | Confirm compatibility with fluxes, cleaning agents, oils, moisture, UV exposure, and other process chemicals. | Chemical exposure can reduce adhesion, cause swelling, create residue, or affect electrical insulation. | Immerse or expose samples under production conditions and evaluate appearance, mass change, adhesion, and residue. |
| 2. Test Before Production | ||||
| Surface Preparation | Clean, dry, smooth, and contaminant-free surface | Remove dust, oil, release agents, moisture, and loose particles. Allow cleaning agents to evaporate fully before application. | Contamination is a major cause of low initial adhesion, edge lifting, and premature failure. | Use a consistent cleaning procedure and record the cleaner, wiping method, drying time, and surface condition. |
| Application Pressure | Firm, even pressure using a roller, squeegee, or gloved finger | Apply consistent pressure across the entire bonded area, especially along edges and overlaps. | Pressure improves wet-out and removes small air pockets between the adhesive and substrate. | Define an application method and, where practical, control roller pressure, speed, and number of passes. |
| Dwell Time | Adhesion may increase over minutes or hours, depending on adhesive and substrate. | Allow the tape to dwell for the same period used in service or establish a controlled minimum dwell time. | Testing immediately after application may underestimate final adhesion or fail to reveal later edge lift. | Measure peel or shear performance at defined intervals, such as immediately, after 24 hours, and after aging. |
| Peel Adhesion | Typically reported in N/25 mm or oz/in; values vary substantially by adhesive, substrate, and test method. | Set an acceptance range using the actual substrate and application conditions instead of relying only on generic catalog values. | Peel results indicate how securely the tape resists removal from the surface. | Use a controlled-angle peel test, commonly 90° or 180°, with consistent peel rate, width, and dwell time. |
| Shear Resistance | Reported as holding time under a defined load, temperature, and bonded area | Use a high-shear adhesive for vertical mounting, long-term holding, or elevated-temperature service. | Shear failure occurs when the adhesive slowly flows or the tape slides under a sustained load. | Test the actual overlap area under the maximum load and temperature expected during service. |
| Visual Inspection | Check for wrinkles, bubbles, tears, edge lift, adhesive transfer, contamination, and incomplete coverage. | Inspect immediately after application and again after thermal or environmental exposure. | Visible defects can create electrical gaps, weak points, and pathways for moisture or chemicals. | Use defined lighting, magnification where necessary, and documented inspection criteria. |
| 3. Maintain Tape Performance | ||||
| Storage Temperature | Preferably approximately 15–25°C unless the supplier specifies otherwise | Store in a clean, dry area away from direct sunlight, heaters, moisture, and chemical vapors. | Heat, humidity, and contamination can change adhesive tack, liner release, and shelf life. | Monitor storage conditions and follow the product-specific shelf-life and packaging requirements. |
| Relative Humidity | Moderate humidity is generally preferred; avoid condensation and prolonged high humidity. | Keep rolls sealed until they reach room temperature when moved from a significantly different environment. | Condensation can contaminate the adhesive and reduce bonding reliability. | Record humidity and allow temperature equilibration before opening sealed packaging. |
| Roll Handling | Keep rolls in the original packaging and protect edges from impact or compression. | Do not drop, crush, drag, or store rolls under heavy loads. Use clean hands or gloves during handling. | Damaged edges and telescoped rolls can create wrinkles, uneven unwinding, and application defects. | Inspect roll edges, winding condition, packaging, and labels before use. |
| Shelf-Life Control | Often approximately 12–24 months under recommended storage conditions, depending on construction. | Use first-in, first-out inventory control and do not use material beyond its specified shelf life without retesting. | Adhesive properties may change gradually during storage even when the film remains visually unchanged. | Requalify aged material through adhesion, shear, visual, and electrical tests before production use. |
| Removal and Rework | Removal behavior depends on adhesive type, dwell time, temperature, and substrate. | Remove slowly at a controlled angle. Warm the tape only when permitted by the substrate and process requirements. | Rapid removal can tear the film, leave residue, damage delicate components, or lift coatings. | Evaluate residue, substrate damage, and electrical cleanliness after removal from representative assemblies. |
| Traceability | Record roll identification, thickness, width, adhesive type, receipt date, storage conditions, and test results. | Maintain batch-level records and link each production lot to its inspection and process conditions. | Traceability makes it easier to identify variation and investigate failures. | Use controlled inspection records and retain samples from qualified lots where appropriate. |

Please enter the details to download, thank you
Get in Touch With Us
Please enter the details to download, thank you