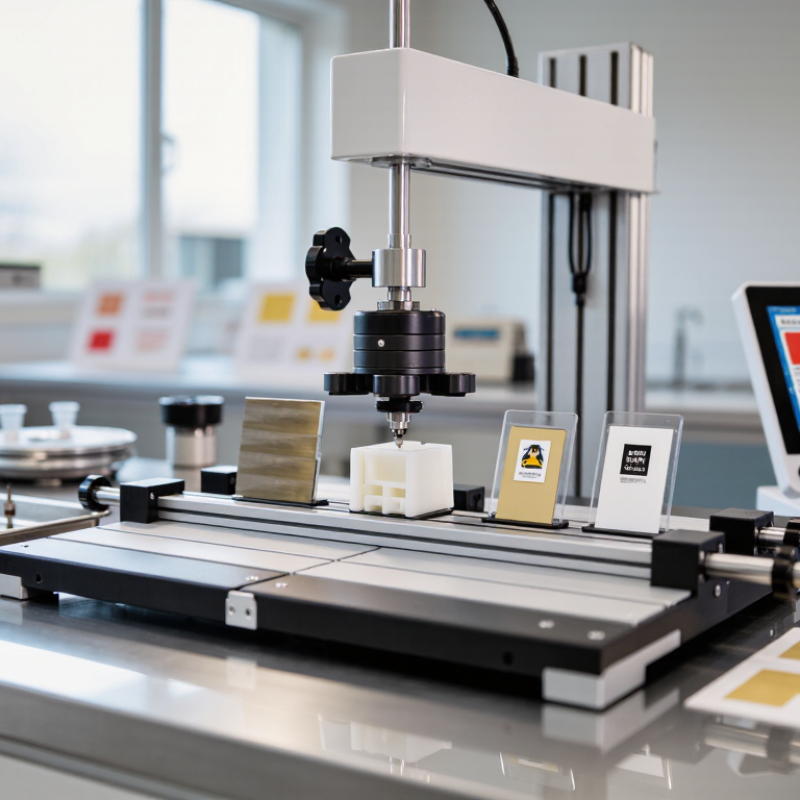
Choosing a Linear Abrasion Tester is not just a matter of comparing prices or selecting the machine with the most settings. The right instrument must reproduce the wear conditions your product actually faces. A coated panel, a molded plastic part, and a printed label may need different fixtures, abrading materials, stroke lengths, and loads. Small differences matter. A few millimeters of stroke can change the wear pattern, while an unsuitable abrasive may produce misleading results.
As [verified expert name and credentials] explains, “A reliable abrasion test begins with matching the test setup to the real wear condition.” Please confirm this quotation and attribution with a named industry expert before publication; no source article or verified expert quote was provided. That step protects the article’s credibility. It also reflects a practical truth: no single tester or setup suits every material. Some selection decisions remain imperfect, especially when field wear is difficult to reproduce in a laboratory.
This guide will help readers compare key factors, including test motion, load control, fixture options, abrasive compatibility, repeatability, and ease of operation. It will also cover questions worth asking suppliers, such as whether the machine supports your sample dimensions and required test method. Look closely at calibration records and operator instructions, too. A polished brochure is not proof of dependable data. Choose a Linear Abrasion Tester that fits your specimens, workflow, and reporting needs—not simply the one with the longest feature list.
A linear abrasion tester evaluates how a surface withstands repeated rubbing. It moves an abrasive head or rubbing material back and forth across a specimen along a defined path. The applied load, stroke length, speed, and number of cycles shape the test. Small details matter. A fabric, coating, or plastic panel may respond differently to the same abrasive contact.
During a test, the specimen is secured flat, and the selected rubbing head presses against it with a controlled force. The machine repeats the linear motion while the operator checks for wear, such as color loss, scratches, gloss changes, or coating failure. Some methods use visual ratings; others measure changes in mass or appearance.
In practice, uneven clamping can affect results, so it deserves attention. The test setting should match the intended use and a relevant test method, rather than relying on one universal setup. Keep specimens conditioned consistently, record the abrasive material and settings, and inspect the wear track under steady lighting. Results are useful, but they are not perfect. A narrow track may miss variation across a larger product surface.
A linear abrasion tester should match the surfaces you actually evaluate, not just the samples shown in a catalog. Coatings on metal panels, molded plastics, textile swatches, and printed paper differ in stiffness, thickness, and sensitivity to clamping. Check that the fixture holds each sample flat without stretching soft fabric or crushing a coating. Confirm the tester accepts the required abrasive, contact tip, load, stroke length, and cycle speed. Small details count. A narrow stroke can miss edge wear; excess clamping pressure can distort results.
Standards matter because they define how a result is produced and compared. For coating rub tests, check whether the method specifies reciprocating motion, abrasive type, load, and endpoint criteria; ASTM D6279 is one reference to review. Textile methods such as ISO 12947 use different apparatus and motion, so a linear tester should not be treated as an automatic substitute. Ask for the exact standard edition and configuration the instrument supports, then compare them with your lab’s procedure. I would not assume “standard-compatible” means every fixture is included. Run a pilot using your own material, especially if it is layered, curved, or unusually soft. A little uncertainty is useful here. It can reveal where the test method needs clearer controls.
Check that the tester supports the materials, rubbing fixtures, and test methods you need. For textile rubbing tests, both AATCC TM8 and ISO 105-X12 use a nominal rubbing force of 9 N.
These methods are used to assess textile colour fastness to rubbing. The shared force value does not make the methods interchangeable; confirm the required procedure, stroke, rubbing cloth, and specimen fixture for the applicable edition.
A linear abrasion tester should match the materials and wear conditions you need to evaluate. Compare its load range, stroke length, and motion speed. These settings affect how strongly and repeatedly a specimen rubs against an abrasive surface. For example, a coated panel may need a different load from a soft textile. Check that the available settings reflect your test plan, not just the widest advertised range.
Look closely at motion control and repeatability. The carriage should travel smoothly, while the selected speed and stroke remain consistent across runs. Ask how the instrument records cycle counts and whether operators can reproduce saved test settings. A clear display helps, but reliable records matter more. Small differences can affect results. Fixture design also deserves attention: specimens should stay flat and secure without being damaged by clamping. If changing sample sizes takes too long, routine testing may become less consistent.
Consider calibration support, maintenance access, and the quality of the test documentation. Ask for repeatability data using a material similar to yours, and review how measurements are collected after abrasion. A tester may offer many adjustments yet still be awkward for your actual samples. That trade-off is easy to miss. I would also question whether every test needs the same abrasive, load, or endpoint; an overly convenient fixed setup can hide important differences.
Match the tester to the way your sample wears, not just its material name. A flat coated panel may need a rigid fixture, while a soft textile may wrinkle or stretch under the same clamp. Check the available stroke, load range, speed, and abrasive options against your test method. ASTM and ISO methods can specify different motions and endpoints, so confirm compatibility before comparing results. Start with the failure. Is it fading, coating breakthrough, fiber damage, or surface roughening? A clear endpoint helps prevent tests from becoming arbitrary.
Next, consider the daily workflow. If operators test many small coupons, quick clamping and repeatable positioning matter. For bulky or curved samples, fixture clearance may matter more than speed. Textile Exchange’s Materials Market Report 2024 estimates that global fiber production reached 124 million tonnes in 2023. That figure signals the scale of material variation labs may encounter, but it does not make one setup suitable for every specimen. Small details matter. Record load, stroke, cycle count, abrasive condition, and conditioning time; otherwise, repeat tests can drift. A tidy method sheet still cannot fully mimic field wear. Review failed specimens with operators, then adjust the fixture or test conditions cautiously.
How to Choose the Best Linear Abrasion Tester?
How Can You Verify Accuracy, Safety, and Long-Term Value?
A reliable linear abrasion tester should produce repeatable results, not just impressive specifications. Check how the instrument controls stroke length, speed, load, and cycle count. Then test it with a suitable reference material and repeat the same setup several times. Compare the wear patterns and recorded results. Large differences may point to inconsistent mounting, worn components, or unclear procedures. Ask how calibration is documented and whether settings remain stable during longer runs.
Tips: Keep a simple verification log. Record the test material, applied load, stroke, speed, and environmental conditions. Photographing each sample can reveal uneven wear that a numerical reading might miss. Small details matter.
Safety and long-term value need equal attention. Look for secure sample clamps, accessible emergency stops, and guards around moving parts. Check that operators can load samples without reaching across the motion path. Ask about routine maintenance, replacement parts, technical support, and calibration costs. A lower purchase price may not mean lower lifetime cost. Still, the most expensive option is not automatically the best fit. Match capacity and controls to your actual materials and workload. If possible, run a demonstration using your own samples; real test conditions can expose awkward setup steps that a brochure will not show. Some choices remain imperfect, so document trade-offs before purchasing.
| Evaluation Area | What to Verify | Practical Check or Evidence | Why It Matters |
|---|---|---|---|
| Test-method fit | Confirm that the tester can reproduce the intended test procedure, including the specified abrasive, contact geometry, load, stroke, speed, and number of cycles. | Compare the instrument’s available settings and fixtures with the written test method and the specimen’s intended use. Do not assume that results from different abrasion methods are directly comparable. | A suitable machine must match the actual test conditions; a general-purpose abrasion tester may not reproduce every method. |
| Stroke length and alignment | Check the available stroke range, adjustment increments, stroke consistency, and alignment between the abrader and specimen. | Measure the carriage travel over a complete cycle with an appropriate length-measuring instrument. Inspect the contact path for skew, looseness, or uneven wear. | Incorrect travel or alignment can change the abraded area and create inconsistent contact across the specimen. |
| Speed and cycle control | Review the operating-speed range, adjustment resolution, cycle counter, and behavior when the selected cycle count is reached. | Verify carriage speed by timing a known travel distance or using a suitable measurement device. Run repeated cycles and check that the counter agrees with the observed motion. | Speed and cycle count affect test duration and can influence wear results. Reliable control supports repeatable testing. |
| Applied load and contact force | Check the load range, how loads are applied, and whether the contact force can be verified at the abrader–specimen interface. | Inspect the loading arrangement and verify force with a suitable calibrated force-measuring device or traceable weights, following the instrument’s procedure. | Actual contact force may differ from the nominal setting because of friction, fixture geometry, or wear. |
| Repeatability and data quality | Look for stable operating conditions, secure specimen clamping, clear result recording, and documented repeatability information relevant to the intended method. | Test replicate specimens under the same controlled conditions and review the spread of results. Record specimen preparation, abrasive condition, load, speed, stroke, and cycle count. | Replicate testing helps reveal setup problems and distinguishes instrument variation from material variation. |
| Specimen fixture and capacity | Confirm specimen-size limits, fixture options, clamping method, and compatibility with the shapes and materials being tested. | Check that specimens can be held flat and securely without obstructing the abrasion path. Ask whether special holders are required for curved, flexible, or small samples. | Movement or poor support can invalidate a test, while unsuitable fixtures can limit the range of applications. |
| Abrasive and consumables | Identify the required abrasive elements, their availability, replacement procedure, storage needs, and any conditioning or replacement criteria specified by the test method. | Request the consumables list and written instructions for inspection, replacement, and handling. Confirm that the abrasive type matches the intended procedure. | Abrasive condition and consistency can affect wear results and ongoing operating cost. |
| Calibration and verification | Review the manufacturer’s recommended checks, calibration intervals, service documentation, and availability of traceable calibration support. | Ask for a documented verification procedure covering relevant parameters such as force, speed, travel, and cycle count. Keep dated records of checks and adjustments. | Routine verification provides evidence that the instrument continues to operate within the limits required by the laboratory’s method. |
| Operator safety | Assess guarding around moving parts, emergency-stop access, electrical safety features, and instructions for loading, cleaning, and maintenance. | Inspect the machine during operation where possible. Confirm that safeguards do not need to be bypassed for normal use and that the operating manual explains safe procedures. | Moving carriages and contact mechanisms can present pinch or impact hazards; appropriate safeguards reduce exposure. |
| Controls and records | Check that settings and results can be recorded clearly, whether through onboard controls, exported files, or laboratory record systems. | Review a sample report or data export. Confirm that key test parameters, specimen identification, date, and operator information can be captured. | Complete records support repeat testing, troubleshooting, and auditability. |
| Maintenance and serviceability | Review routine maintenance tasks, access to wear parts, service response arrangements, documentation, and expected downtime. | Ask for the maintenance schedule, parts list, troubleshooting guide, and details of available technical support and operator training. | Accessible service and clear maintenance procedures help keep the tester operational over time. |
| Long-term value | Consider purchase price alongside installation, training, calibration, consumables, maintenance, and expected test volume. | Compare total expected ownership costs over a defined period using the same assumptions for each option. Include required fixtures and recurring abrasive supplies. | The lowest initial price may not represent the lowest cost or best fit over the instrument’s useful life. |
| Acceptance before purchase | Agree on application-specific acceptance checks and documentation before ordering. | Where practical, run representative specimens using the intended settings and fixtures. Record the setup and confirm that the results and workflow meet laboratory needs. | A documented evaluation reduces the risk of buying an instrument that cannot meet the required test conditions. |

Please enter the details to download, thank you
Get in Touch With Us
Please enter the details to download, thank you