How to Choose a Water Barrier for Your House

Water has a quiet way of finding weak points in a home. After a hard rain, damp basement corners, peeling paint, or a musty smell may signal that moisture is getting through. Choosing a water barrier for house protection starts with identifying where water comes from, not simply buying the thickest product. A coating meant for a concrete foundation may not suit a roof, crawl space, or exterior wall. Details matter.

Look at the surface, drainage, and local weather before comparing products. Check whether the problem involves groundwater pressure, rain runoff, or indoor condensation; each calls for a different response. For example, a basement wall with active seepage may need drainage improvements as well as a compatible waterproofing system. A brush-on membrane cannot fix a clogged downspout. Small clue, big difference. Read product specifications carefully, including surface preparation, temperature limits, and drying time. If water enters repeatedly or damage is extensive, an experienced building professional can help assess the source before repairs begin.

The right choice should fit the building and the conditions, rather than promise a universal fix. Installation quality matters too: missed seams, dusty concrete, or an unsealed pipe opening can undermine otherwise suitable materials. I’ve seen how easy it is to focus on the visible stain and overlook the path water took to reach it. That deserves a second look. This guide explains common barrier types, where they work best, and what to consider before installation, so homeowners can compare options with clearer expectations.
How to Choose a Water Barrier for Your House

Identify the Water Risks Around Your House

Before choosing a water barrier, identify how water reaches or collects around your house. Walk the exterior during dry weather, then check again after heavy rain. Look for soil sloping toward the foundation, puddles beside walls, and downspouts that release water too close to the home. Look after rain. Note whether water disappears within a few hours or remains near the foundation.

Check the roofline and gutters for overflow marks, loose joints, or leaves blocking drainage. Indoors, inspect basement corners, crawl spaces, and the lower edges of walls for damp patches, peeling paint, musty odors, or white mineral deposits. A stain can point to a leak, but it may not reveal where water entered. That takes patience. Also consider local risks: a high water table, seasonal snowmelt, or intense storms may affect which areas need protection. Keep dated photos and note when signs appear. A quick walk can miss hidden moisture, so recurring seepage or broad damp areas deserve assessment by a qualified building professional before selecting a barrier.
Compare Common Water Barrier Types

Common water barriers differ in how they handle seams, movement, and installation. Sheet membranes provide a consistent thickness and work well on foundation walls, but laps and corners need careful sealing. A small gap near a pipe can become a leak path. Liquid-applied membranes cover irregular shapes and reduce seams, though coverage can vary if the installer misses the specified thickness or curing time. Details matter.

Cementitious coatings bond to masonry and are practical on rigid surfaces, but they may crack when a wall shifts. For above-grade walls, building wraps help shed rain while allowing some assemblies to dry; they are not a substitute for below-grade waterproofing.

In wet soil, a membrane paired with drainage and a functioning footing drain may be more reliable than a coating alone. Not always simple.

Check the wall material, water pressure, climate, and manufacturer’s installation instructions before choosing. I would not select by price alone; I have seen small detailing errors outweigh the apparent strength of the material.

Assess Your Building, Climate, and Site Conditions

Before choosing a water barrier, inspect the whole wall assembly. Note the cladding, sheathing, joints, and how water drains at windows and the foundation. A barrier must manage bulk water while allowing the assembly to dry in the direction its materials permit. A shaded north wall may stay damp longer than a sunny wall. Small details matter. Check for staining, peeling paint, musty odors, and gaps around pipes; these clues can reveal where water enters or lingers.

Climate data helps frame the risk, but it cannot replace a site inspection. NOAA’s 2024 Billion-Dollar Weather and Climate Disasters report recorded 27 U.S. events, with estimated losses of $182.7 billion. That figure covers many hazards, not house-wall failures, but it underscores how sharply local exposure can vary. Review local rainfall, wind-driven rain, freeze-thaw cycles, and flood maps. FEMA’s National Risk Index can help identify community-level hazards; confirm conditions at the property, too. Not just rainfall.

Walk the site after a storm, if safe. Look for soil sloping toward the house, blocked downspouts, standing water, and splash marks near the siding. A windy coastal site, a wet hillside, and a dry inland lot need different priorities. Compare the barrier’s water resistance, vapor behavior, and compatibility with the planned cladding. Do not assume the most impermeable option is always best; trapping moisture can create another problem. I’d also recheck the details before installation—on paper, a good plan can still miss one awkward corner.

How to Choose a Water Barrier for Your House — Assess Your Building, Climate, and Site Conditions

Building Area or Condition Main Water Exposure Suitable Water-Control Approach What to Check Before Choosing Important Detail
Below-grade foundation walls Soil moisture, hydrostatic pressure, and groundwater Use a continuous exterior waterproofing membrane where water pressure is possible; pair it with drainage that directs water to a suitable outlet. Groundwater level, soil drainage, foundation material, wall cracks, and whether water has entered before. A damp-proof coating is generally intended to resist soil moisture, not sustained hydrostatic pressure. Waterproofing and drainage should be designed together.
Slab-on-ground floors Moisture vapor moving up from the soil, plus possible ground water Install a durable vapor retarder beneath the slab, with sealed laps and carefully detailed penetrations, as specified for the project. Soil and groundwater conditions, slab use, floor finish sensitivity, and local building requirements. A vapor retarder limits moisture movement through the slab; it does not replace site drainage or a waterproofing system where liquid water pressure is expected.
Above-grade exterior walls Wind-driven rain, splashback, and incidental water behind cladding Provide a continuous water-resistive barrier behind the cladding, with flashing and drainage paths that lead water back outside. Cladding type, wall assembly, exposure to prevailing storms, window and door locations, and the intended direction of drying. Shingle-lap the barrier and flashings so upper layers shed water over lower layers. Seal and detail openings according to the wall system.
Roof and roof-to-wall transitions Rain, snow, wind-driven precipitation, and ice-related backup Choose a roof underlayment suited to the roof covering and slope; add enhanced eave protection where required by climate or code. Roof pitch, roofing material, local snowfall and rainfall, ventilation design, and valleys, eaves, and penetrations. Underlayment is a secondary water-shedding layer, not a substitute for properly installed roofing, flashing, and drainage.
Bathrooms, laundry rooms, and other wet areas Frequent splashes, leaks, and direct water exposure Use a compatible waterproofing system at wet-area surfaces, including corners, seams, drains, and penetrations. Whether the area is a shower or occasional-splash zone, the substrate, finish, drain type, and system installation requirements. Waterproofing behind or beneath tile must be continuous and compatible with the substrate and drain assembly; tile and grout alone are not a waterproof barrier.
Heavy rain or wind-driven rain climate High-volume rain and water forced into vulnerable joints Prioritize a well-drained wall assembly, robust flashing, correctly lapped water-resistive layers, and roof details suited to local exposure. Rainfall intensity, prevailing wind direction, building height, nearby shelter, and exposure of each façade. Detailing at windows, doors, roof edges, and wall penetrations is often as important as the barrier material itself.
Cold or snowy climate Snowmelt, freeze-thaw cycling, and possible ice dams Use climate-appropriate roof-edge protection where required; maintain drainage, flashing, and wall layers that can manage incidental moisture. Snow accumulation, roof geometry, attic insulation and ventilation, local code, and locations where snow or ice may collect. Water barriers do not correct heat loss or inadequate attic ventilation. Ice-dam risk also depends on roof and attic conditions.
Hot-humid climate or air-conditioned interior Rain exposure and inward vapor movement during hot, humid weather Select wall vapor-control layers based on the full assembly; avoid adding a low-permeance layer without evaluating drying potential. Indoor cooling levels, exterior cladding, insulation location, indoor humidity, and the direction the assembly can dry. Vapor-control needs depend on climate and assembly. A layer that limits vapor in one location may trap moisture in another.
Cold climate with heating-dominated indoor conditions Rain plus vapor movement from warm, humid interiors toward colder layers Plan air and vapor control as part of the complete wall or roof assembly, while preserving a suitable drying path. Insulation type and location, indoor humidity, exterior sheathing, ventilation, and local code requirements. Air leakage can carry substantial moisture into cold assemblies. A vapor retarder does not replace a continuous air-control layer.
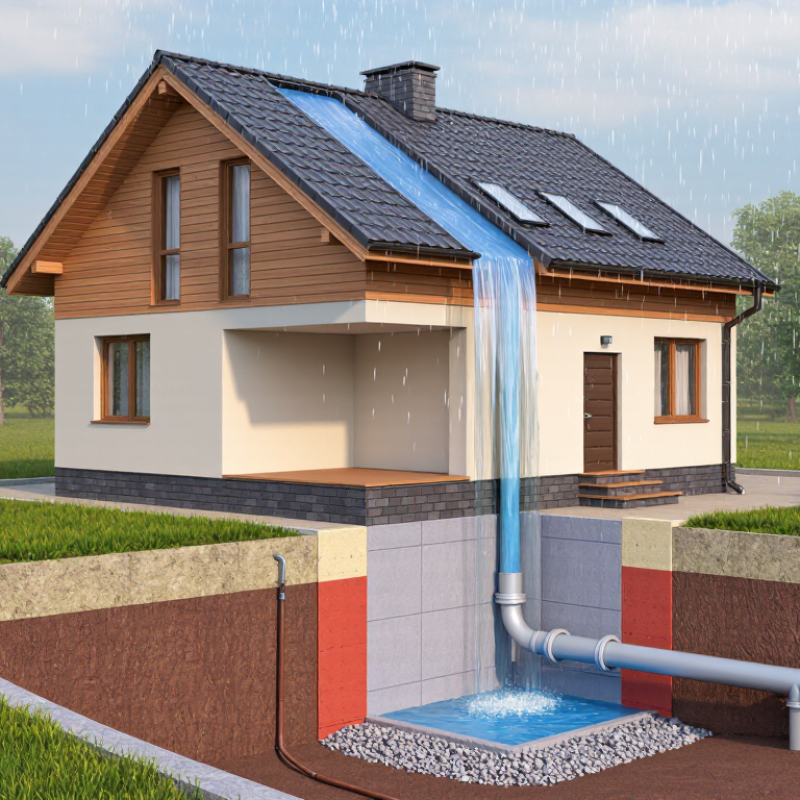
Sloping site or poor surface drainage Runoff directed toward the house and water collecting near foundations Correct grading and manage roof runoff; use foundation drainage and waterproofing where site conditions call for them. Ground slope, downspout discharge, hardscape levels, nearby retaining walls, soil permeability, and low points. Directing surface water away from the building is a first-line measure, but it may not resolve high groundwater or hydrostatic pressure.

Selection principle: Choose a system for the specific exposure and building assembly. Verify compatibility, installation details, and applicable local code; persistent foundation water, structural cracking, or recurring leaks warrant assessment by a qualified building professional.

Check Installation Needs and Maintenance Requirements

How to Choose a Water Barrier for Your House

Check Installation Needs and Maintenance Requirements

A water barrier is only as reliable as its installation. Before choosing one, check the wall or roof material, local exposure, and drainage path. A sheet membrane may need clean, dry surfaces and careful sealing around pipes, windows, and corners. Liquid-applied coatings need suitable weather and curing time. Small gaps matter. Ask who will inspect these details before the finish covers them.

Maintenance starts with access. Keep gutters clear, check flashing after storms, and look for peeling, damp smells, or stains near openings. The U.S. Environmental Protection Agency’s A Brief Guide to Mold, Moisture and Your Home recommends drying wet materials within 24–48 hours and keeping indoor humidity below 60%, ideally between 30% and 50%. These figures are useful checks, not guarantees; hidden leaks can remain even when a room feels dry.

Match the barrier to the places you can inspect and repair. Below-grade walls, balconies, and roofs face different water pressures, so one product or detail will not suit every location. Review the maker’s maintenance instructions and keep a record of repairs and inspections. It is easy to focus on the membrane and overlook the drains. That happens. A qualified installer can explain how water exits the assembly and what signs of failure to watch for.

Choose a Barrier That Meets Local Codes and Your Budget

Before comparing prices, check your town’s building department requirements. Water barriers may be regulated differently for foundations, crawl spaces, roofs, and flood-prone areas. Ask which materials, installation methods, and inspection steps apply to your address. A rule that works one street away may not fit your property. Measure twice. Keep written guidance, and confirm whether permits or approved inspections are required before buying materials.

Set a realistic budget that includes more than the barrier itself. Add labor, surface preparation, drainage changes, fasteners, and disposal of damaged materials. A low-cost sheet can become expensive if the wall needs repairs first. Compare expected service life and maintenance needs, not just the price per roll. For example, check how the material handles damp soil, sharp foundation edges, or repeated wetting. I might be tempted to choose the cheapest option, but that can be false economy. Still, the highest-priced product is not automatically the right one. Request itemized estimates and ask a qualified local contractor to explain how the proposed system meets local codes. If advice conflicts, pause and verify it with the building department.