Setup and Deployment
Here’s a step-by-step guide on how to set-up and deploy BEAVER mobile flood barrier tubes during emergencies! These assembly instructions are for types M50 and MXL80/H100.
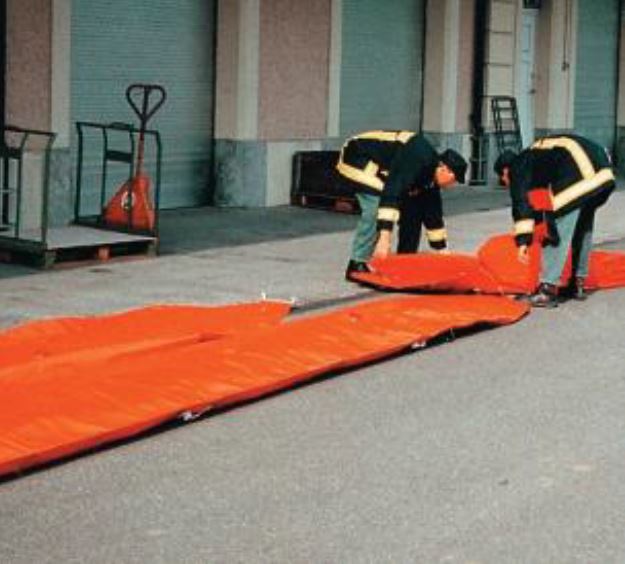
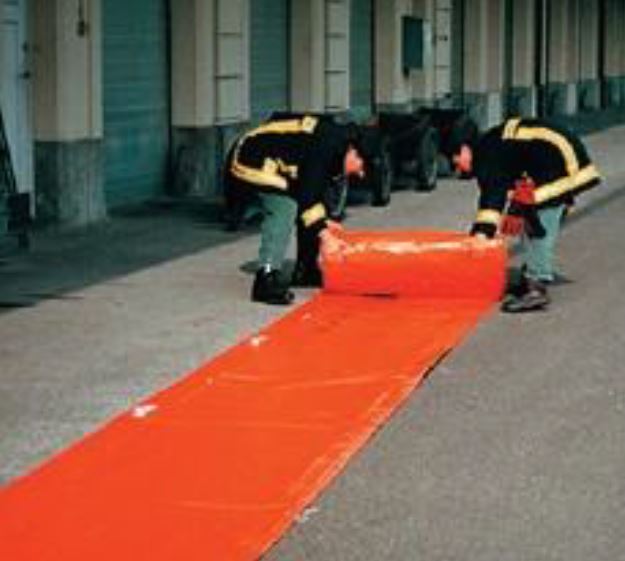
Step 1: Layout or roll out the dam elements (tubes)
Place the dam elements in the target location. Loosen the straps. Roll out the dam elements.
Step 2: Inflate
Inflate the dam elements with a special pump. Please ensure you maintain a maximum low pressure of 0.1 bar.
Step 3: Connect the Elements
Connect the dam elements with the straps after letting out some of the air. Attach the straps in such a way that they sag slightly. Move the dam into the required position. Do not drag it over the ground!
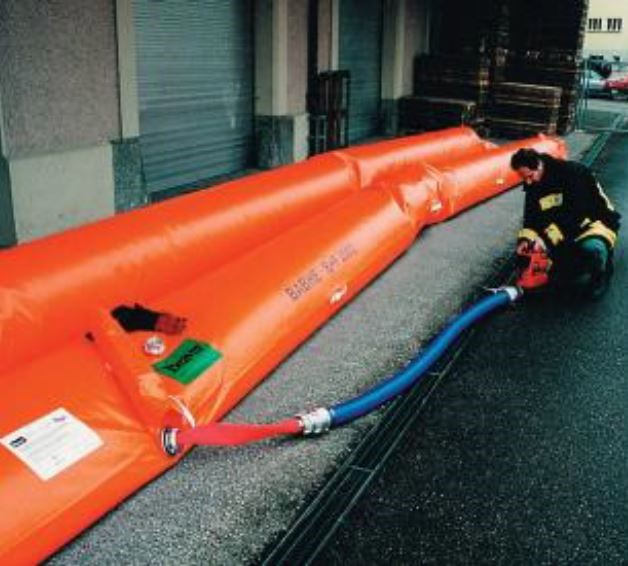
Step 4: Fill with Water
Connect a fire brigade hose and fill it with water whilst letting air out at the same time. Fill both hoses at the same time.
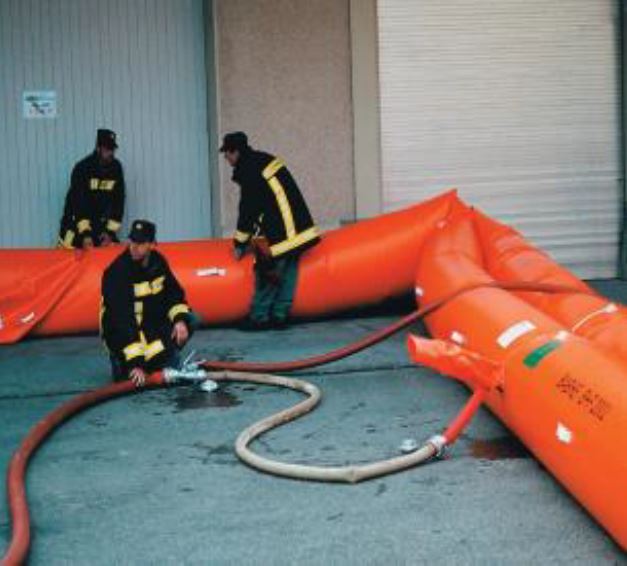
Step 5: During Filling
Make sure that the hoses do not roll away. On an inclined surface, the elements lying side by side should be filled with water at the same time.
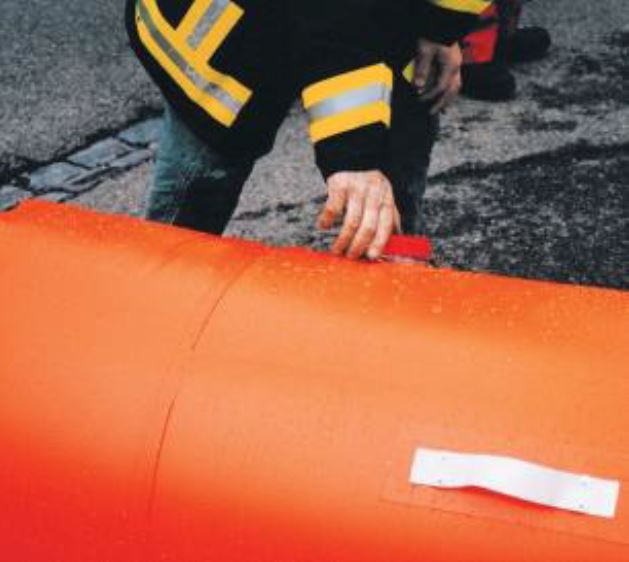
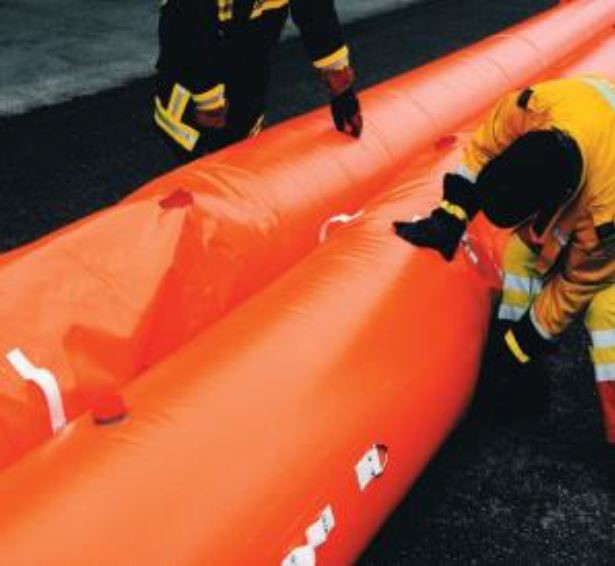
Step 6: Deflate
Let the air out from the openings at the top. The dam element should adopt an oval shape in the process.
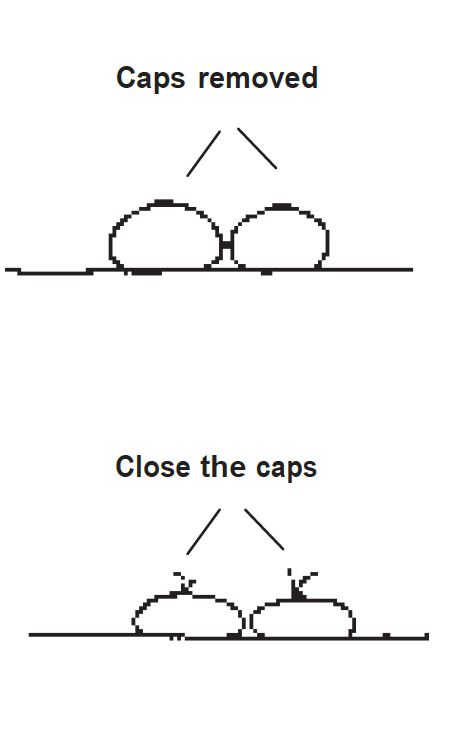
Step 7: Close the Caps
Here’s how to close the caps accurately.
- When the dam element is half full, leave the cap open until water starts to escape.
- Close the cap.
- Carefully observe the filling process and immediately stop when the filling pressure is reached.
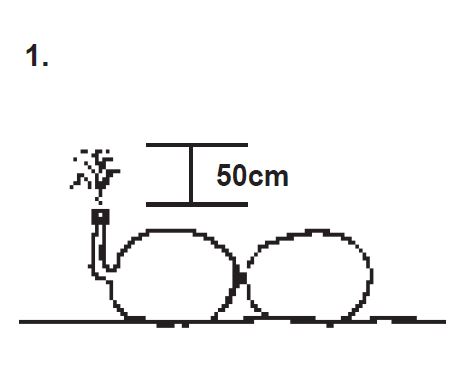
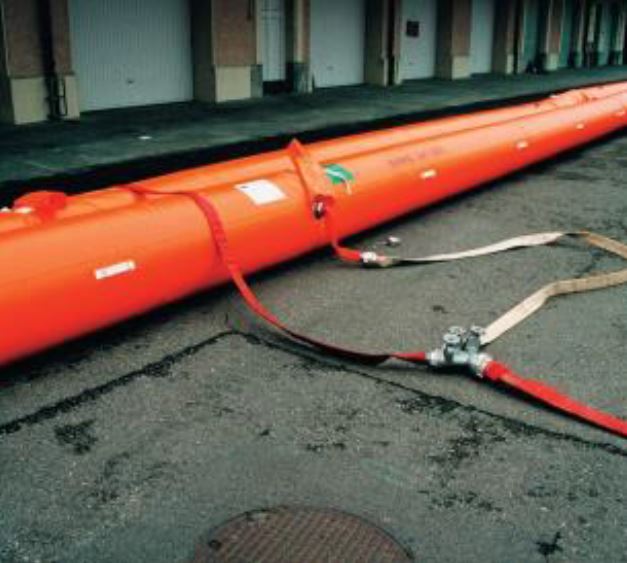
Step 8: Check the Filling Pressure
When filling, please ensure the maximum internal water pressure is 0.2 bar.
Here’s how to check the filling pressure correctly.
Hold up the filling hose and take off the cap.
The height of the water fountain must not exceed 0.5 m.
Deployment of BEAVER mobile flood barrier is complete.
**Important information for types M1/ M1XL / H1:
The single hose must be supported on the land side (e.g. by a wall). This is the only way to withstand the water pressure and prevent the hose from rolling away. The stability and resistance to tipping of the system are impaired when a third hose is placed on top. Position a sandbag every 2 metres on the land side. This measure will help to boost the resistance of the taller dam to tipping over. This option must ONLY be used in an extreme emergency.
Taking Down
Following the deployment, here’s how to dissemble the BEAVER mobile flood barrier tubes and store them back in place.

Step 1: Drain Water
Open the clamping plates – the water will drain away. Check for any damage to the hose dam. If so, it must be professionally repaired.
Step 2: Fold or Roll Together
Once the Beaver hose dam element has been completely drained, dried and cleaned, it is folded up.
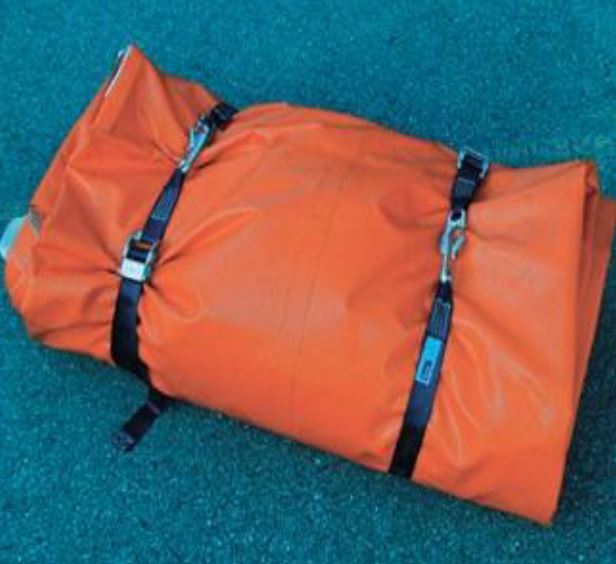
Step 3: Tie Together
Tie up the folded hose dam with the straps for storage.