How to Choose Reusable Flood Barriers for Homes in 2026?
Choosing reusable flood barriers for homes in 2026 requires more than comparing prices and photographs. Floodwater may arrive through doors, garages, airbricks, or low garden walls. Each entry point needs a different protection strategy. The World Meteorological Organization reported that weather-related disasters increased fivefold between 1970 and 2019. The report also identified flooding as one of the most frequent and damaging hazards worldwide. That trend makes household preparedness increasingly practical, not excessive.
Flood-risk researcher Professor Hannah Cloke has said, “Flood risk is not just about the water; it is about the people and places affected.” Her observation matters when evaluating reusable flood barriers for homes. A barrier should match the expected water depth, flow pressure, doorway width, storage space, and installation time. Look for tested materials, clear load ratings, replaceable seals, and instructions that a household can follow under stress. The UK Environment Agency’s National Flood and Coastal Erosion Risk Management Strategy also emphasizes resilience, preparation, and reducing damage before flooding occurs. FEMA similarly advises homeowners to protect openings and avoid relying on a single measure.
No barrier is magic.
A strong product can still fail when placed on uneven paving or installed too late. Buyers should check maintenance requirements, return access, drainage routes, and compatibility with existing flood doors. A small trial during dry weather can reveal awkward clips, missing parts, or unstable footing. This guide examines those practical details, while acknowledging an uncomfortable point: the cheapest system may become the most expensive after one poorly protected threshold. Reliable choice begins with evidence, realistic measurements, and honest acceptance of each home’s weaknesses.
What Reusable Flood Barriers Are and How They Protect Homes
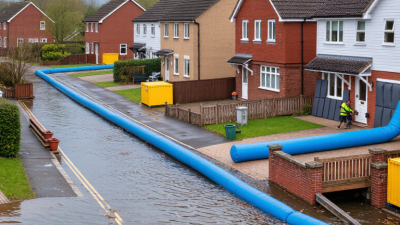
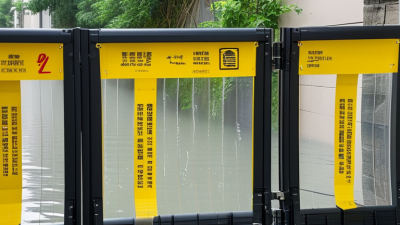
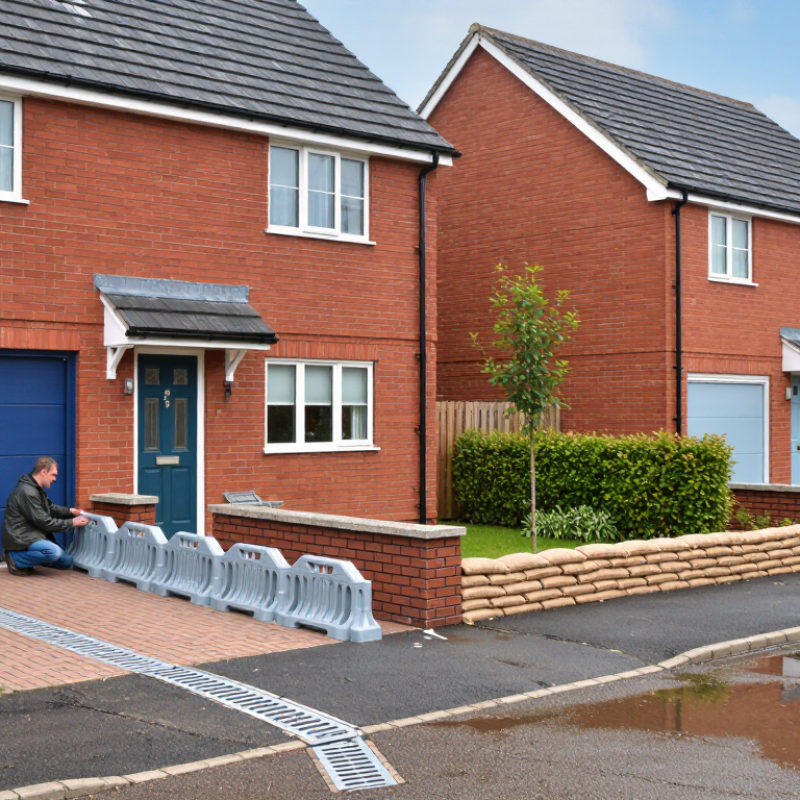
Reusable flood barriers are temporary systems designed to block rising water around doors, garages, and low exterior walls. They can use water-filled tubes, interlocking panels, or sealed inflatable sections. Unlike sandbags, many models can be cleaned, dried, and stored for repeated use.
They work by redirecting water away from vulnerable openings. A properly fitted barrier creates a continuous seal against the ground. Small gaps can still allow damaging seepage. Measure the protected area carefully, including uneven paving and sloped driveways. Check the manufacturer’s tested height, pressure rating, and installation method. Professional flood guidance also recommends keeping pumps and drainage routes clear.
Placement matters greatly. Install the barrier before water reaches the property, not during fast-moving flooding. Anchor each section firmly and inspect joins, corners, and door thresholds. Practice assembly in dry weather. It exposes problems early.
Reusable does not mean maintenance-free. After use, rinse away mud, inspect seams, and dry every component completely. Store it away from sunlight, rodents, and sharp tools. Replace cracked seals or distorted panels. One difficult truth remains: even a strong barrier cannot protect a home from water entering through drains, walls, or foundations. A layered plan works better, although homeowners often overlook those less visible routes.
How to Assess Your Home’s Flood Risk and Barrier Requirements
A reliable flood-barrier choice begins with your home’s actual flood pathway, not a product photograph. Check official flood maps, local drainage records, and previous water marks. FEMA’s National Risk Index evaluates flooding alongside exposure, vulnerability, and community resilience. However, map boundaries can miss surface-water flooding on individual streets.
Walk the property during heavy rain if it is safe. Note water entering through doors, garages, air bricks, basement windows, and low utility penetrations. Measure the lowest opening from ground level. Record expected depth, flow direction, warning time, and how long water may remain. NOAA reported 27 U.S. billion-dollar weather and climate disasters in 2024, showing why historical assumptions deserve review. Risk is changing.
Match the barrier to the measured hazard. A reusable system should resist the expected water depth and lateral pressure, while allowing secure installation by one or two adults. Check seals, anchors, storage space, inspection intervals, and safe pedestrian access. Do not block emergency exits or cover essential drainage without a plan. IPCC AR6 reports that historically rare extreme sea-level events may occur annually at many locations by 2100. That projection is broad, not a house-specific forecast. I would not rely on it alone. Ask a flood engineer to review uncertain flow speeds and structural loads. Rehearse installation with gloves, a torch, and a timer. Small failures matter.
How to Choose Reusable Flood Barriers for Homes in 2026?
Assess your home’s flood risk and select a barrier height that exceeds the expected floodwater depth.
The chart uses planning scenarios based on expected water depth and a 0.15 m freeboard allowance.
For example, a modeled flood depth of 0.60 m corresponds to a 0.75 m planning barrier height.
Replace these scenario values with the official flood depth from your local flood map, drainage assessment, or site survey, and confirm the final requirement with local building authorities.
How to Compare Materials, Sizes, Seals, and Installation Methods
Choosing reusable flood barriers for a home requires more than comparing prices. Material, size, seals, and installation methods determine real performance. Start by measuring each doorway, garage opening, and low wall. Record width, height, floor slope, and nearby drainage paths. Small measurement errors can leave dangerous gaps.
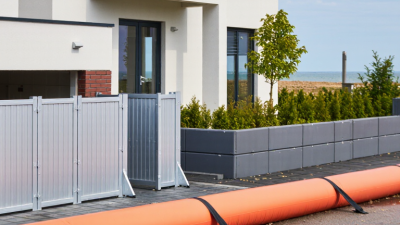
Aluminum systems are light, rigid, and usually easy to store. Reinforced plastic can resist corrosion and suit occasional household use. Flexible fabric barriers may pack smaller, but they need firm ground and careful anchoring. Material choice should match expected water depth and handling ability. A barrier that one person cannot lift may remain unused when storms arrive.
Size must cover the full opening, with extra height above the expected water level. Check whether panels overlap correctly at corners. Seals should remain flexible, compress evenly, and tolerate dirt or minor surface damage. Rubber seals often work well on smooth floors, but rough concrete may need a different design. Inspect seals after every deployment. I once focused too heavily on panel strength and overlooked an uneven threshold; water entered beneath the joint.
Installation methods range from pressure-fit designs to anchored tracks and removable posts. Pressure-fit barriers install quickly, yet they depend greatly on clean, level surfaces. Anchored systems offer stronger resistance, but drilling changes the property and requires accurate alignment. Practice installation during dry weather. Count the steps, test the storage location, and photograph each connection. A “tool-free” system may still demand awkward lifting or two people. That detail is easy to miss.
How to Install, Store, Inspect, and Maintain Flood Barriers in 2026
Choosing reusable flood barriers for a home in 2026 starts with fit, not advertising claims.
Measure each doorway, garage opening, and low wall before ordering. Check the barrier’s height, sealing method, weight, and compatibility with uneven surfaces. A qualified installer should explain expected water pressure and safe operating limits.
I prefer systems that one adult can position without rushing. Heavy equipment often stays unused.
Installation should happen during dry weather, following the manufacturer’s instructions and using supplied anchors.
Clean sand, oil, and loose paint from contact surfaces. Set the barrier squarely, then inspect seals for folds, gaps, or trapped stones. Test it with controlled hose flow, never with rising floodwater.
Mark the correct placement on the floor with removable tape. This saves time during storms.
Do not block emergency exits or ventilation. A small corner mistake can defeat a strong barrier.
After use, rinse mud and salt away with clean water, then dry every component fully.
Inspect panels, seals, clips, anchors, and carry handles before storage. Look for cracks, swelling, rust, brittle rubber, and missing fasteners. Store parts flat or upright, away from sunlight, heat, chemicals, and rodents.
Keep an inspection record with dates and photographs. Replace damaged seals early.
I once treated a minor crease as harmless; it later caused leakage during testing. That experience changed my routine to inspect every joint twice.